Arizona is a treasure trove of natural beauty.
Upper Antelope Canyon is a stunning hidden gem, known for its swirling dust and vibrant orange walls. Located just a two-hour drive from the Grand Canyon, it's well worth a visit!
However, the canyon's beauty comes with a few challenges. Formed by erosion from flash floods, these floods pose risks to visitors. Plus, expect to encounter large crowds, as the canyon is often quite busy.
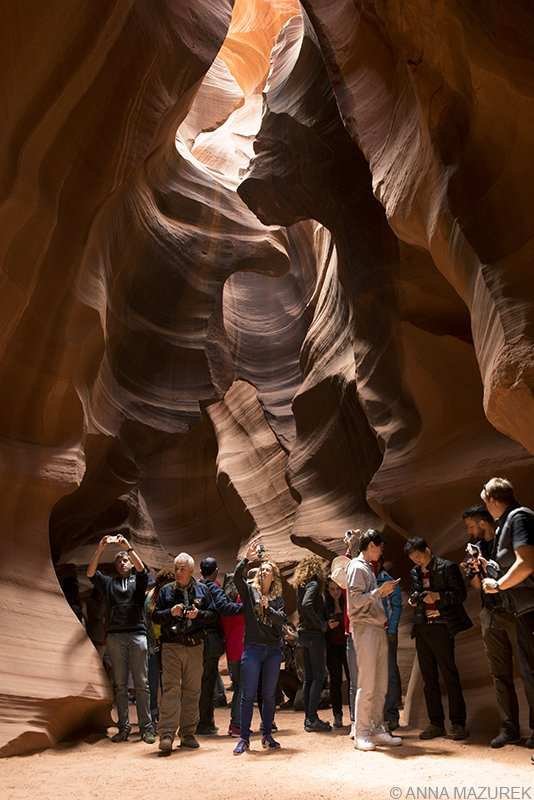
To capture photos without the throngs of people, opt for a photo tour. These guides can create brief moments of solitude for your shots.
After detouring to another site, my next adventure was a photo tour of Upper Antelope Canyon, situated on Navajo land. Despite the crowds, the experience was breathtaking! I only wish I had more time to explore. Pro tip: Reserve your tour and photo permit at least a month ahead. Check out the guide below for insights on planning your trip and securing a photo permit!
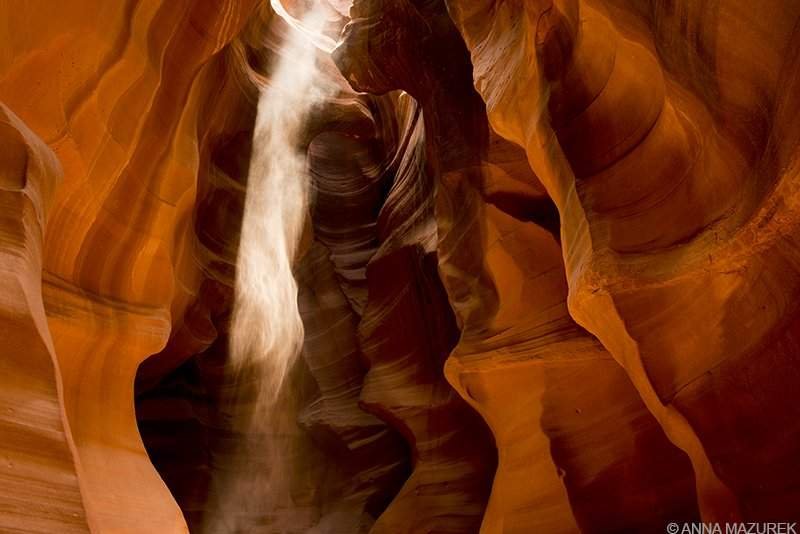
This photo of sand drifting in the light beams was captured at f/8 for 1/4 of a second at ISO 400 using a Nikon D800 with a 24-70mm lens.
Essential Information About Antelope Canyon
Optimal Visiting Times: There are two Antelope Canyons. Upper Antelope is at ground level and famous for its iconic light beams, while the less popular Lower Antelope requires navigating stairways. Additionally, there are three nearby slot canyons: Rattlesnake Canyon, Owl Canyon, and Mountain Sheep Canyon.
For the best light beams in Upper Antelope, visit between late March and early October, ideally in the mid-morning hours. Off-peak times have fewer visitors.
Photography Tours: Access to the canyon is exclusively through tours. Prices vary, from $88 USD for a two-hour photo tour to $48 USD for a standard experience. Only those on photo tours can bring tripods. The guides are exceptional at managing crowd control, giving you precious moments to capture photos. Tours tend to fill up quickly, so it's wise to book about a month in advance! I chose Adventurous Antelope Canyon for my tour.
One downside of the tour is that guides often throw sand into the light beams, which may not appeal to everyone. I personally prefer natural shots without added elements.
Navajo Nation Photography Permits: Since Antelope Canyon is part of the Navajo Indian Reservation, a $50 photo permit is necessary for any commercial use of your images. This includes posting on social media for profit. Although my tour company insisted I keep the permit handy during the tour, nobody checked it. Obtaining a permit post-visit incurs much higher fees.
The permit application process is quite cumbersome. My tour company provided a broken link and a list of phone numbers, but no one answered. Eventually, I connected with Shana at the correct office, who was incredibly helpful. If you call, ask for her!
Most photography permits require a 30-day turnaround. Each permit costs $50 per site and must be paid by check or money order. You'll need to provide the date and time of your visit when applying.
Photography permits are required at six locations:
- Camp Assayi/Bowl Canyon
- Canyon de Chelly
- Four Corners Monument
- Lake Powell Navajo Tribal Park (Antelope Canyon)
- Little Colorado River Tribal Park
- Monument Valley Navajo Tribal Park
For inquiries, refer to the contact information on the permit application form for your destination.
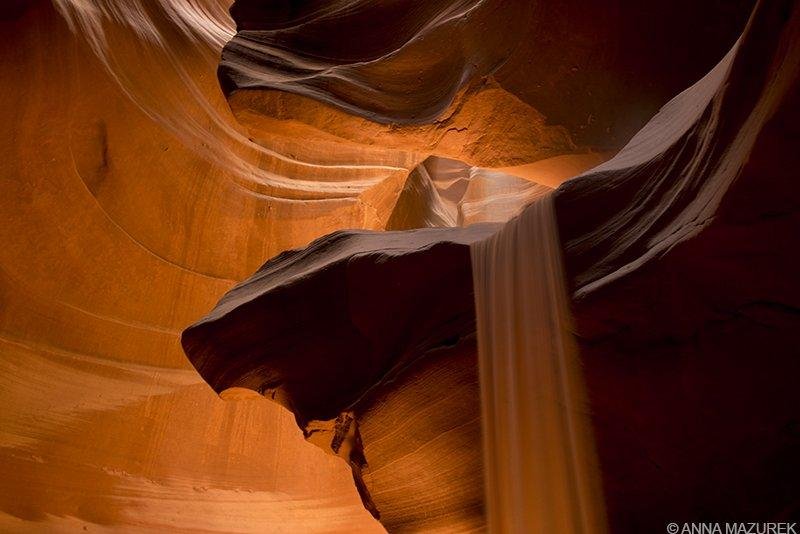
Capturing motion blur from the sand requires slower shutter speeds. This shot was taken at .4 of a second at ISO 800.
Photography Tips for Antelope Canyon
- Bring a sturdy tripod. Many visitors had flimsy tripods that couldn't withstand the tight space. Use a solid tripod that supports your camera's weight.
- Utilize a wide-angle lens. Capture the expansive beauty of the canyon. Avoid changing lenses inside, as dust can damage your equipment. Keep your aperture between f/8 and f/18.
- Employ a remote shutter release. This helps avoid camera shake for sharper images! Recommended shutter speeds range from two to 20 seconds. Be ready, as you'll only have a minute or two when the crowd is held back.
- Maintain a low ISO. To minimize graininess, aim for ISO settings between 200-400, rarely exceeding 400.
- Set a cloudy white balance. This will enhance the reddish tones in the rock, highlighting its natural beauty.
- Keep a lens cloth handy. Due to the airborne dust, regularly check and clean your lens.
UP NEXT:
Travel Tuesday Interview: Couchsurfing Adventures
In the upcoming Travel Tuesday Interview, I'll chat with experienced Couchsurfer Nishant Prasad about how he saves on lodging while traveling by staying on couches. He even met his fiancé through Couchsurfing!
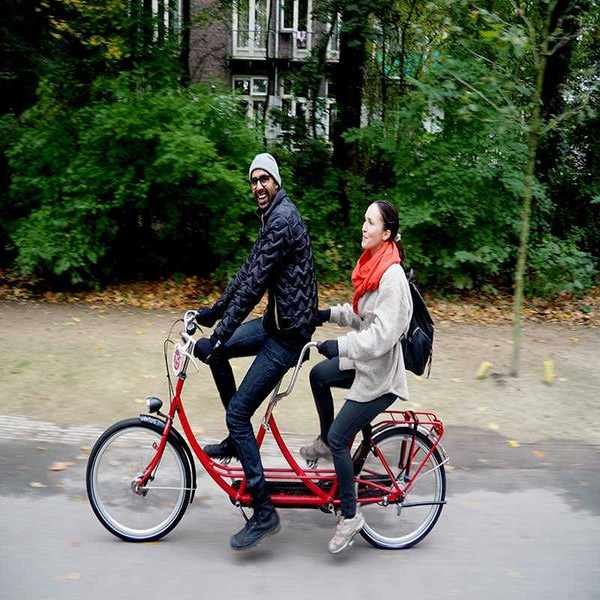
Nishant Prasad and his fiancée Isabelle biking in Amsterdam.