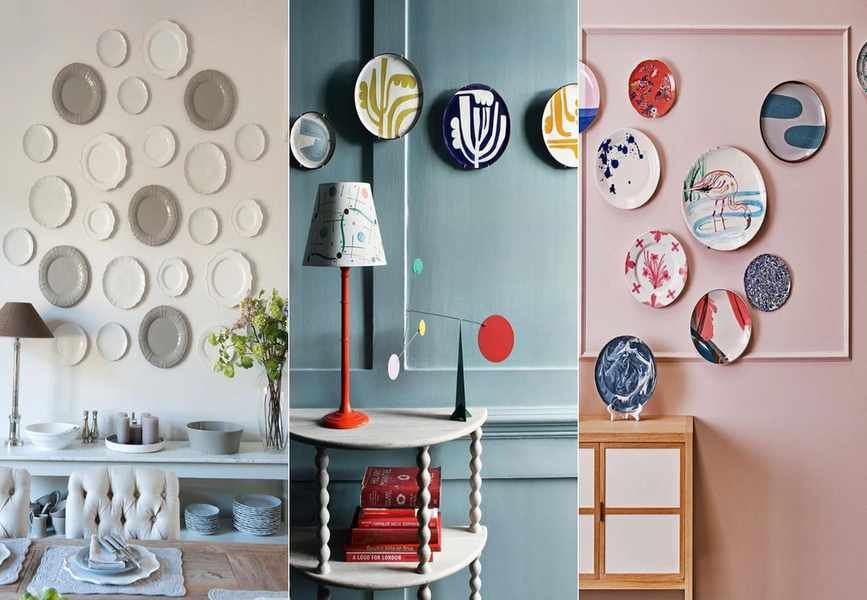
Hanging plates can be more challenging than putting up pictures due to their fragility and diverse shapes and sizes. Nevertheless, a plate wall can be a stunning and personal accent in any room.
Explore: Home makeover ideas – simple ways to transform your home
According to an expert in the field, 'Creating a plate wall offers a budget-friendly and unique method to enhance empty spaces.' With the right approach, it's simpler than you might expect.
Here's a straightforward guide to achieve the perfect plate display.
Steps to Hang Plates on Your Wall

'When selecting plates, choose various sizes and styles,' advises the expert. 'Plates that hold sentimental value add depth and meaning to your decor.'
Follow the steps below, and check out this video for additional tips on hanging plates.
Also see: 5 tips for displaying china – inspiration for your plate wall and creative arrangements
1. Measure Your Wall Space
'Start by measuring the area where you want the plate display and arrange the plates on the floor to visualize the layout,' suggests the expert.
Mark the central point of your intended plate wall with tape or a pencil. Using low-tack masking tape to outline the display area on the wall is also beneficial, ensuring your planned arrangement will fit well.
2. Plan Your Plate Layout
'Sketch a rough layout of your plates and jot down measurements,' suggests the expert.
Use this sketch as a guide to set up the plates on the floor within your taped boundaries, adjusting until satisfied.
'Once arranged, measure from the highest plate down, marking these heights on the wall,' she adds.
3. Create Plate Templates
Trace each plate onto separate sheets of paper and cut them out to form templates. Affix each template to the wall in the planned arrangement. Step back to evaluate and modify the layout as necessary.
'Stick to your measurements for guidance, but feel free to adjust creatively!' she notes.
Explore: Cottage decorating ideas – charming tips for adding character to your home
4. Clean the Plates
'Before hanging, clean the back of each plate where the adhesive disks will attach.'
Don't forget to clean the fronts too, ensuring they look pristine without fingerprints.
5. Prepare Plates for Hanging
'To prepare the adhesive disks, wet the back and rub it with your finger for 5-10 minutes. Stick it on the plate's underside and allow 24 hours for it to bond.'
'After preparing, find the center point on the wall and use your measurements/templates to mark where each plate will hang.'
6. Use Command Strips for Hanging
Utilizing Command Strips allows you to avoid nails or screws, letting you rearrange the plates without wall damage. Keep in mind that plates with a lip may not work with Command Strips, but Command Hooks can be used if there's a hole for string attachment.
For those that can use them, clean the plate backs, stick the strips to the wall and the plates, then press firmly together.
7. Hang Plates with Plate Hangers
Plate hangers secure the plate rims in multiple places and feature a clasp to hook over a nail. Ensure the hangers fit the plates correctly to avoid any falling risks.
Also see: Interior design tips – insights from top design professionals
Keep in mind that plate hangers can be visible, so you may want to paint or touch up with varnish to match your plates.