
A kitchen island can significantly elevate your space. It serves not just as a luxury item but as the heart of your kitchen—where cooking, dining, and socializing converge. Getting the design right is essential for functionality and flow.
However, there's no one-size-fits-all solution. The layout and size of your kitchen, along with how you plan to use the island, are critical factors. A well-designed kitchen island harmonizes with its surroundings, while an overly ambitious design can disrupt the flow.
This guide offers expert advice on designing a kitchen island that integrates seamlessly into your home. From size and layout to essential features, we'll focus on the most impactful decisions to make.
1. Determine the Purpose
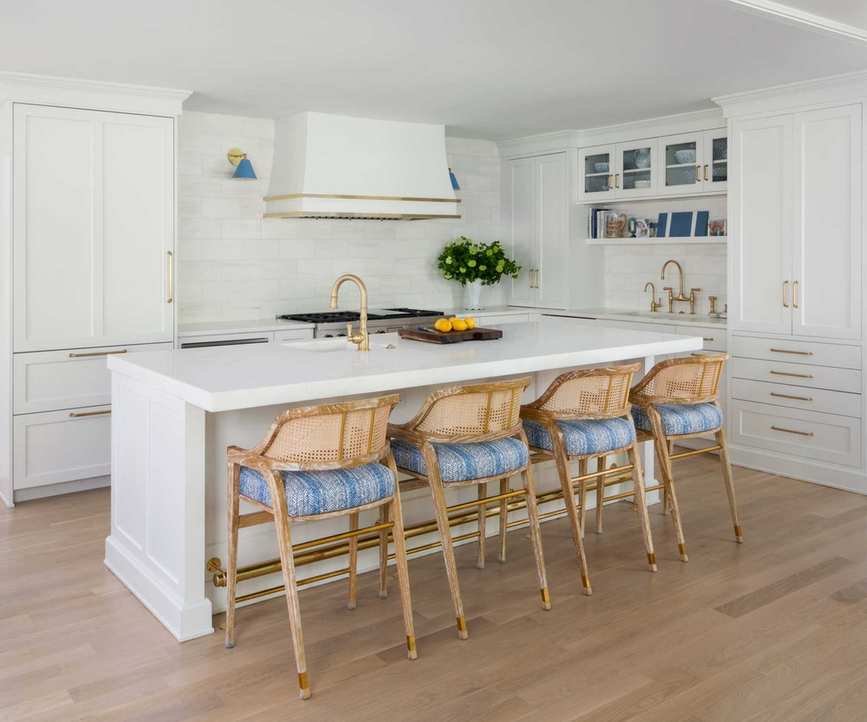
With the sink integrated into the island, this kitchen achieves an ideal work triangle, with ample prep space on both sides.
Before considering size, finishes, or layout, clarify the primary function of your island. Knowing your main purpose shapes the entire design. Maggie Griesbeck, a design expert, emphasizes that the initial question should be where you naturally gravitate when entering the kitchen. If it's the island for coffee, it becomes a social hub; if it's the sink, it serves a practical purpose.
Let Lifestyle Guide the Design
Your lifestyle dictates the island's design. Questions like how often you entertain or who does the dishes can shift priorities dramatically. If you want to supervise kids outdoors while cleaning, sink placement matters. If hosting is your style, prioritize seating and storage.
Establish the Primary Function
Once you've identified your lifestyle needs, define the island's primary function. Many designs fail when trying to cram multiple roles into one space. Prioritize a single function and let supporting roles follow. Common primary functions include:
- Prep area: Clear space for cooking and baking
- Cooking and cleaning: Featuring a hob or sink
- Dining/seating: Casual meals and socializing
- Storage: Drawers and hidden compartments
- Multi-functional hub: A mix of all roles
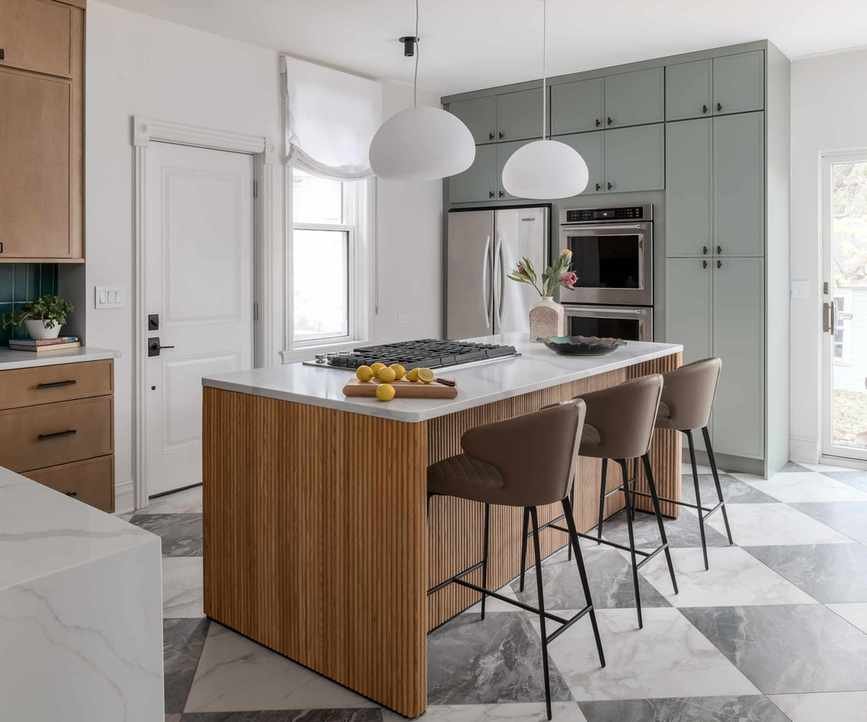
The curved end of this island is ideal for serving drinks and snacks while entertaining.
Consider secondary roles too, like a homework station or crafting hub. These needs influence your design significantly. Additionally, think about storage requirements for items like wine or cookbooks, which could enhance the island's functionality.
2. Size and Proportions Matter
Wider walkways around an island are preferable to a bulky footprint.
Your island should complement the room, not overwhelm it. The goal is balance, allowing the island to fit naturally within the kitchen's overall look. Oversized islands can dominate the space, whereas a perfectly scaled design enhances usability.
Keep these size guidelines in mind:
- Minimum dimensions: 72–84 inches (1.8–2.1 meters) long x 36 inches (0.9 meters) deep
- Ideal dimensions: 96–120 inches (2.4–3 meters) long x 42–48 inches (1.1–1.2 meters) deep, providing ample prep and seating
When an Island is Too Large
Oversized islands can feel imposing. They disrupt movement and create a narrow passageway. While there's no strict limit on length, depth should not exceed a comfortable reach. If accessing the cooktop or sink becomes cumbersome, consider a double island layout for better functionality.
When an Island is Too Small
Conversely, undersized islands can lack utility and presence. If your island feels more like an afterthought, it's likely too small. In such cases, a freestanding prep table might be a more practical choice.
Types of Kitchen Islands
Understanding different kitchen island types can help inform your decisions:
- Single island: A central block for prep, seating, or storage.
- Double island: Two islands for different functions, ideal for spacious kitchens.
- Peninsula: Attached on one side, suitable for tighter spaces.
- Freestanding island: A movable worktable or butcher's block.
- L-shaped island: Extends to create more surface area.
- U-shaped island: Encloses space for maximum storage.
- Split-level island: Two heights for different uses.
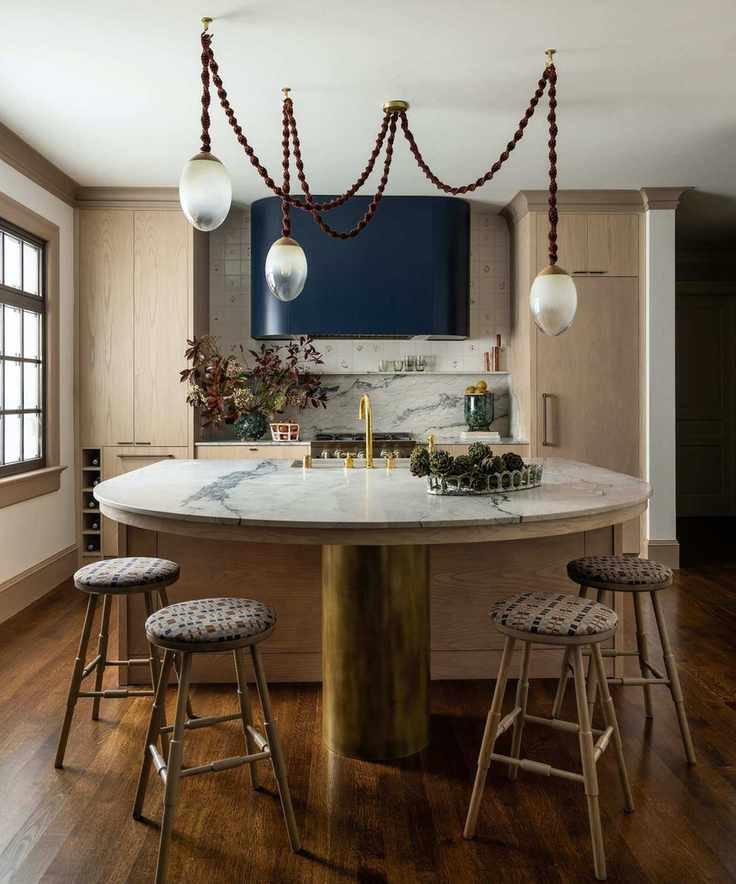
- Curved island: Softens the look and improves flow.
Mock-Up Before Committing
Unsure about scale or shape? Create a mock-up on the floor using tape or boxes to visualize the island's dimensions in relation to the room.
3. Layout and Clearances
Ensure that an island does not block entrances or exits. If circulation is tight, reconsider the layout.
Proper layout and clearances are vital. Recommended clearances around an island include:
- 36 inches (3 feet / 0.9 meters): absolute minimum
- 42 inches (3.5 feet / 1.07 meters): comfortable for one cook
- 48 inches (4 feet / 1.2 meters): ideal for busy kitchens
Pay attention to how people move in the kitchen. Plan routes that minimize disruption, keeping the island from obstructing traffic flow.
Common Kitchen Layouts with an Island
Different kitchen shapes accommodate islands differently:
- L-shaped kitchens: Versatile layout with ample space for circulation.
- U-shaped kitchens: Can work if the room is wide enough, providing a fourth side.
- Galley kitchens: Better suited for slim tables.
- Open-plan kitchens: Islands help delineate areas while maintaining openness.
- One-wall kitchens: Ensure enough space between the island and other areas.
Evaluate family habits to prevent bottlenecks. Adjust the island's position if necessary for a natural flow.
4. Features to Include (or Not)

Overloading an island can lead to inefficiency. A clear surface is often more functional.
While designing an island, restraint is crucial. It's tempting to pack in every feature, but simpler designs often yield better functionality. A cluttered island can be less intuitive to use.
Including a Sink
Most designers recommend against placing the main sink on the island. It can create mess during meal prep. However, a small prep sink can be beneficial, allowing for easy rinsing without disrupting social areas.
Including a Cooktop
A cooktop can enhance sociability, but sufficient space for prep and safety is essential. Ventilation needs consideration, as downdrafts may not be as effective as traditional hoods.
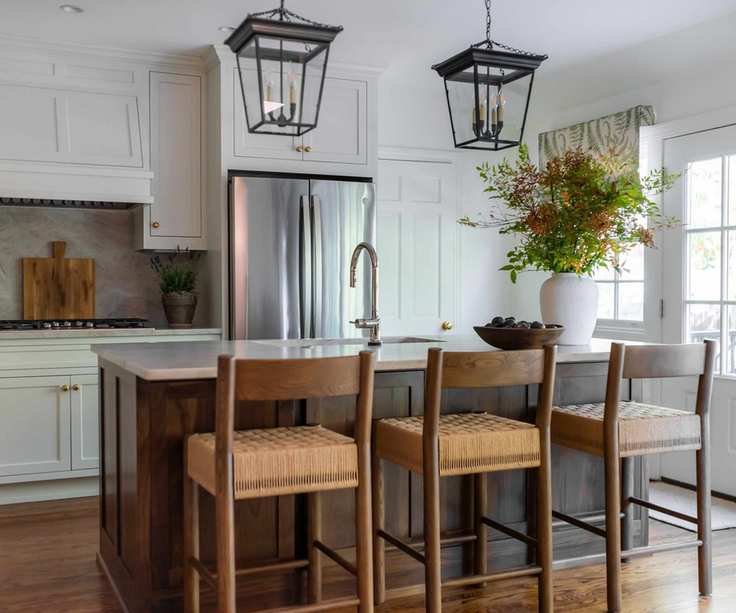
Including Seating
Bar stools make an island a social hub for casual meals and gatherings. However, ensure seating is well-placed to avoid disrupting the cooking process.
Including Storage
Storage transforms an island into a practical space. Deep drawers and pull-outs can help keep everything organized. Yet, avoid overcomplicating storage to maintain legroom and usability.
5. Proper Seating Design
Prioritize comfort and space over cramming in extra stools.
Seating arrangements can make or break your island's usability. Incorrect dimensions can lead to discomfort and disrupt flow.
Key seating stats:
- Overhang depth: Minimum 12 inches (1 ft / 0.3 meters), ideal 14-16 inches (1.2-1.3 ft / 0.35-0.4 meters).
- Width per person: Minimum 24 inches (2 ft / 0.6 meters), 30 inches (2.5 ft / 0.75 meters) for comfort.
- Counter height: 36 inches (3 ft / 0.9 meters) with corresponding stools.
- Clearance behind stools: Minimum 36 inches (3 feet / 0.9 meters), ideally 42-48 inches (3.5-4 ft / 1.07-1.2 meters).
One-Sided vs. Wraparound Seating
A straight line of seating is popular for its clean flow. Wraparound seating can feel cramped unless ample space is available. Consider conversational arrangements for a more social atmosphere.
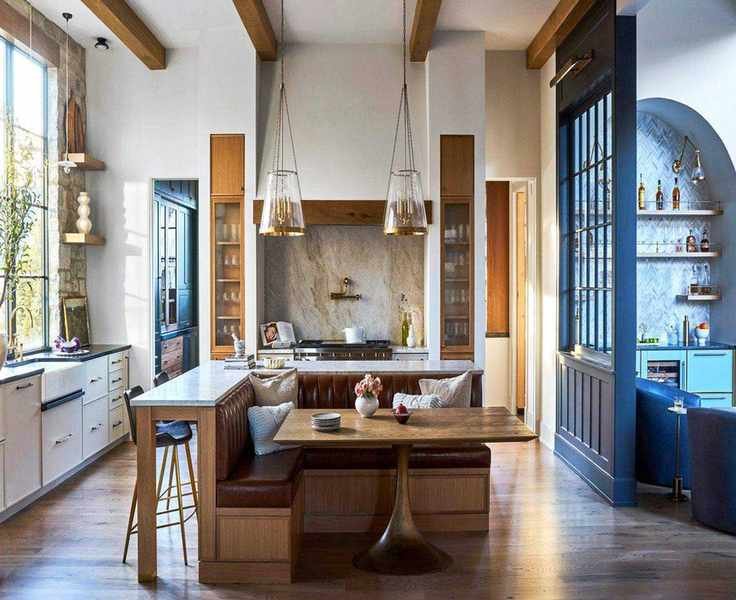
Banquette and Split-Level Seating
For a cozy feel, consider built-in banquettes or split-level seating. These configurations maximize comfort and enhance the dining experience.
Layout and Workflow
Key principles for successful seating include:
- Separate work and social areas to minimize disruption.
- Ensure stools can be pulled out easily.
- Check appliance accessibility without obstruction.
- Avoid seating near messy zones, particularly if a sink is involved.
- Maintain a safe distance from cooktops.
6. Selecting Materials and Finishes
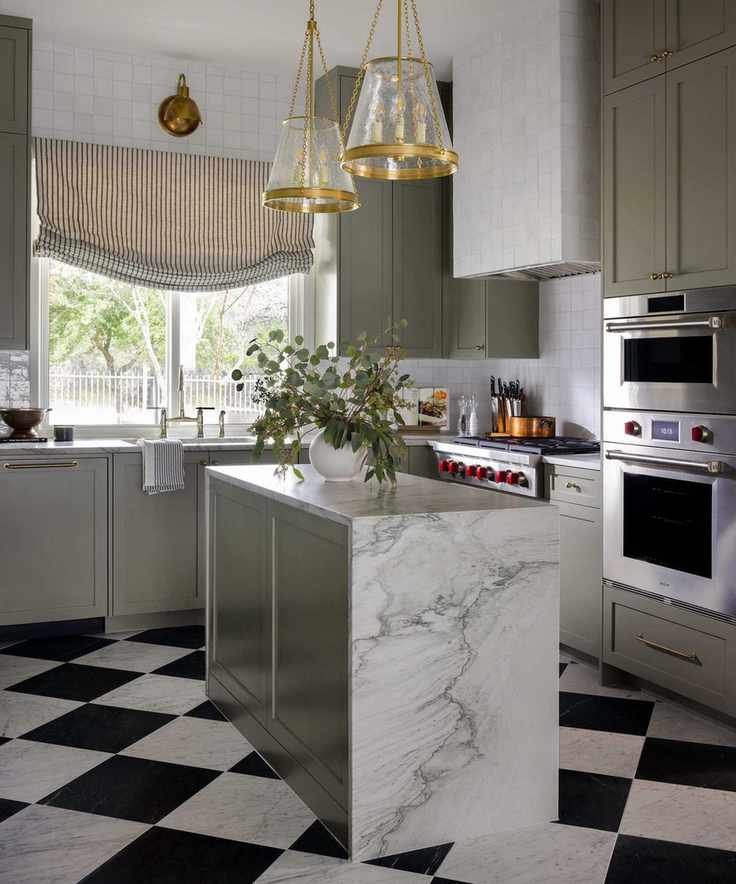
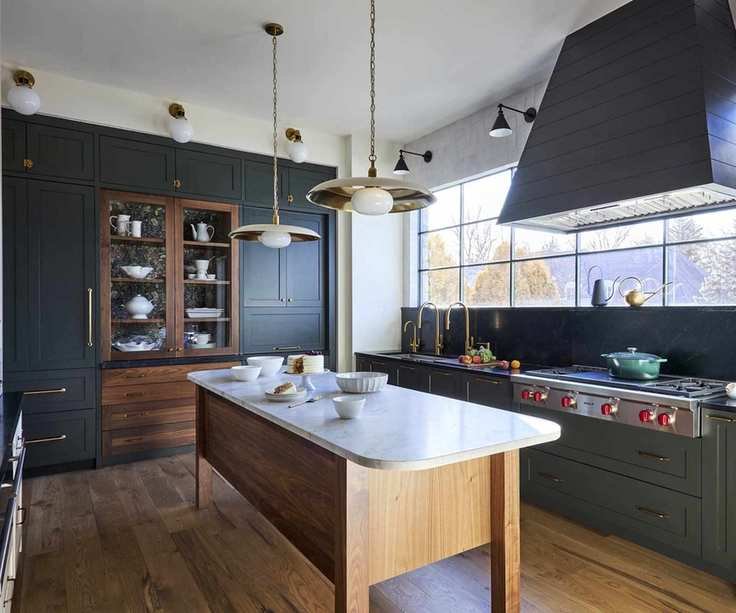
A waterfall edge accentuates the beauty of this compact island.
Materials for kitchen islands must be functional and durable. Countertops need to withstand tasks while remaining visually appealing.
Countertop Choices
Choose wisely based on wear and tear tolerance:
- Marble: Aesthetic but prone to staining.
- Quartzite: Durable but typically pricier.
- Granite: Hardwearing and budget-friendly.
- Porcelain: Resilient and low-maintenance.
- Composite surfaces: Consistent in appearance but heat-sensitive.
- Alternative materials: Can offer unique aesthetics when paired with your needs.
A brass foot rail stylishly protects cabinetry from damage.
Cabinetry Considerations
Island cabinets endure heavy use. Durable finishes and robust materials are essential. Opt for easy-to-clean designs and protective features to prolong life.
Avoiding Material Mistakes
Material choices should align with lifestyle. Avoid surfaces that can't endure heat and spills to prevent future frustrations.
7. Plan Lighting and Electrical Needs
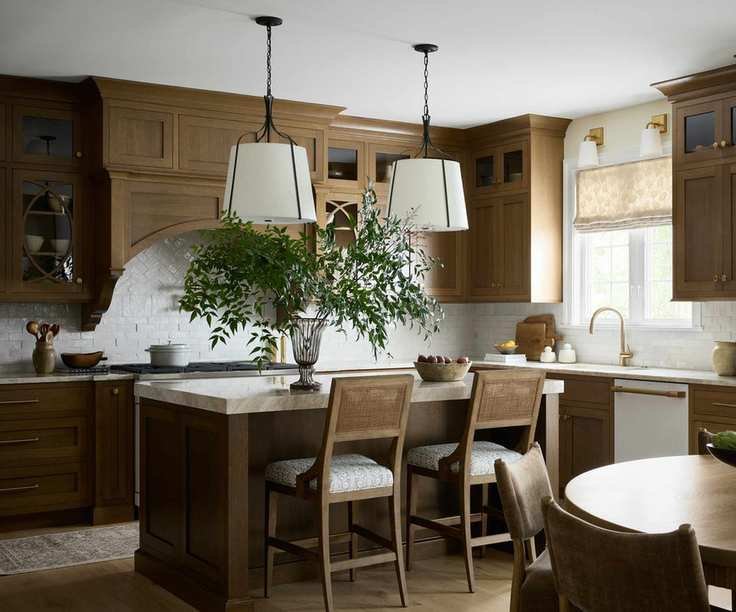
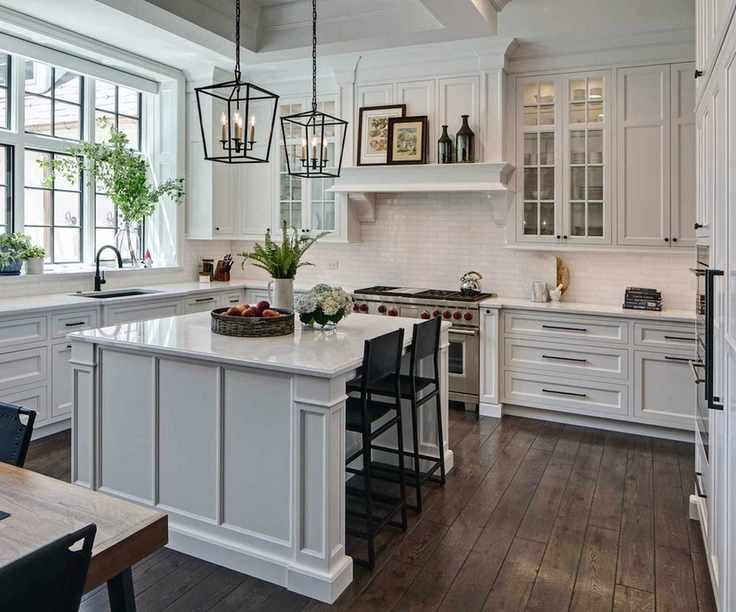
Large pendants define the island and add a decorative touch.
Lighting and electrical planning are vital for usability. A layered lighting approach ensures functionality and ambiance.
Layered Lighting
Pendant lights add visual interest but should not be the sole light source. Combine with recessed lighting for task areas to avoid shadows.
Ensure lighting is on separate circuits and dimmable for versatile use.
Power Outlet Planning
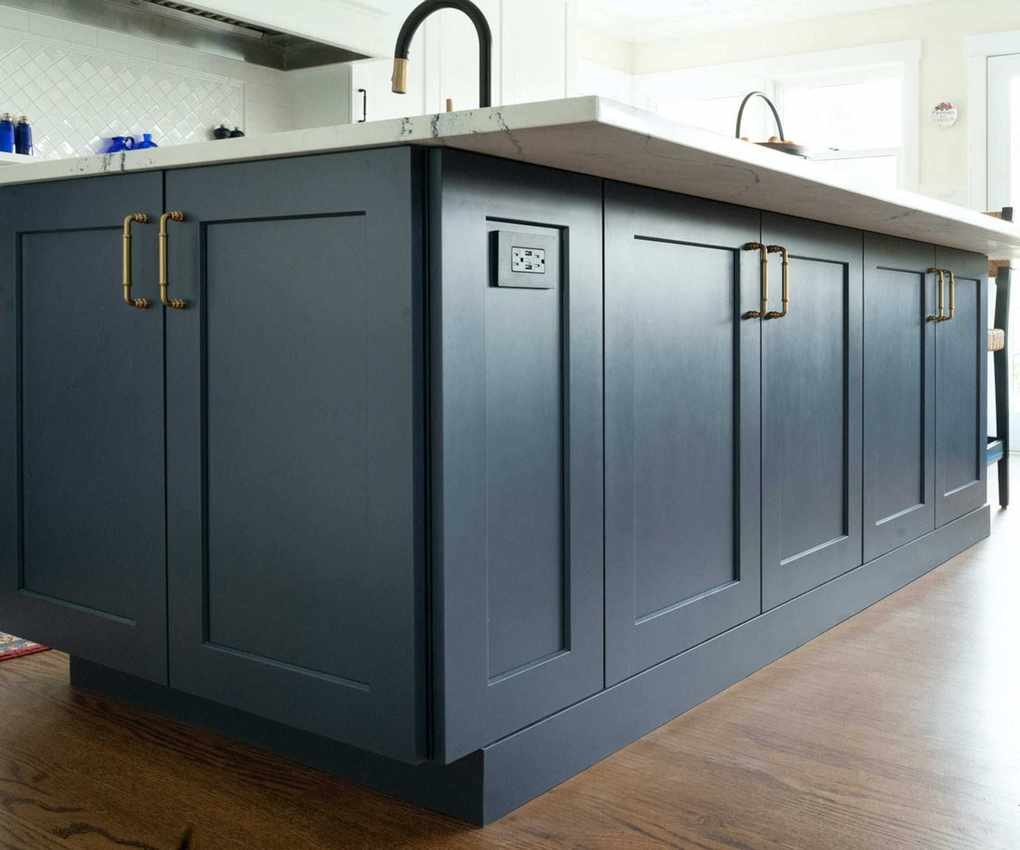
Outlets tucked beneath the overhang maintain aesthetics.
Estimate your power needs early. Conceal outlets to preserve design integrity, placing them strategically to avoid clutter.
8. Avoid Common Design Mistakes

A patterned tiled island adds texture and becomes a standout feature.
Avoid common pitfalls to achieve a successful design:
- Insufficient space around the island can create a cramped kitchen.
- Oversizing can disrupt balance and flow.
- Overloading with features can lead to clutter.
- Poor seating layouts can hinder movement.
- Ignoring workflow can result in inefficiencies.
9. Assessing the Need for an Island

An optimally placed island enhances flow and offers generous storage.
Kitchens often feature islands as must-haves, but they're not always beneficial. In some instances, avoiding an island can enhance functionality.
When an Island Works
Islands thrive in larger, open-plan kitchens, enhancing flow between cooking and dining areas. In tighter layouts, however, they can obstruct movement.
When to Skip an Island
If an island disrupts circulation, duplicates existing storage, or complicates layout, it may be better to forgo it altogether.
Alternatives to Consider
If an island isn't suitable, consider:
- Peninsula: Offers prep and seating without taking up too much space.
- Freestanding table: A versatile option that provides needed surface without dominating.
- Butcher's block: A movable option that adds warmth and practicality.
Designing a kitchen island involves balancing size, layout, and function. Get these core elements right, and the rest will follow. Explore kitchen island ideas for inspiration to personalize your space.


