
If your kitchen cabinets are starting to look worn, it might be time for a fresh coat of paint. Changing their color can significantly enhance the entire room's appearance, as can revitalizing existing painted surfaces.
While hiring professionals for this task is an option, many novice DIYers can achieve remarkable results by following expert advice. With the right tips, painting kitchen cabinets can be a rewarding project.
To get started, familiarize yourself with the process of painting kitchen cabinets from beginning to end. Once you're prepared, follow these expert tips for an impressive finish.
Expert Insights for Painting Kitchen Cabinets
Whether you're searching for fresh ideas for painted kitchen cabinets or looking to update your cabinets without a full replacement, you'll need these essential tips to ensure a professional look.
1. Allow Ample Time for the Project
'One of the best pieces of advice for painting kitchen cabinets is to take your time,' advises a seasoned interior designer. 'Gather high-quality tools and materials beforehand and plan for about a week to complete the job thoroughly.'
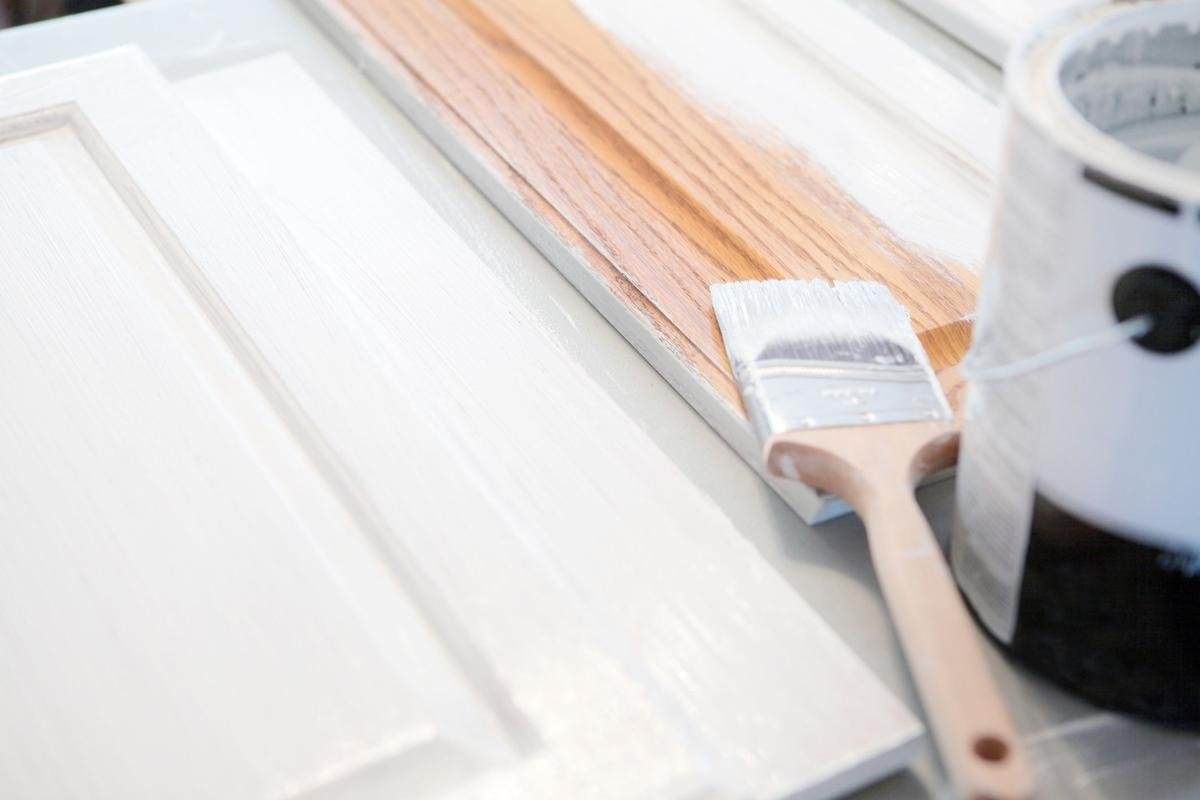
2. Prioritize Preparation
Experts unanimously agree that preparation is crucial. Thoroughly cleaning, sanding, and priming the cabinet doors will lead to a smooth and durable finish.
'Never overlook the prep work,' emphasizes a skilled handyman.
3. Detach Doors and Clean Thoroughly
Start by removing all doors and drawers, then clean each component meticulously.
'Clear and clean out all the cabinets, ensuring all dirt and grease are eliminated, and remove any hardware you're not painting, like knobs and handles,' suggests the handyman. This is also a great time to consider new cabinet handles that will complement your freshly painted doors.
Use a vacuum to eliminate dust and debris from inside the cabinets, spending about five minutes on each one.
4. Safeguard Hardware
After taking off the hardware, an expert recommends placing it all in a labeled bag for safekeeping: 'Number the doors and hardware bags to make reassembly easy,' they advise.
5. Document Your Process
As you work, jot down each step of the disassembly process. This will help you remember how to put everything back together once you've finished painting.
6. Create a Dedicated Workspace
When removing doors and drawer fronts for painting, ensure you have a clean, dry space that's not frequently used, such as a garage or workshop. While the backyard is an option, be cautious of wind blowing debris onto wet paint.
7. Protect Surrounding Areas
If you choose to paint the doors while they are still attached, it's essential to protect adjacent surfaces like hinges, countertops, and appliances. Carefully tape off these areas.
'Make sure to shield any walls or surfaces you want to keep paint-free by applying masking tape along the edges of the cabinets,' advises a senior product manager. 'Also, lay down protective sheets on countertops and floors to catch any paint splatters.'
Repair any holes or imperfections using wood filler.
8. Understand Your Cabinet Materials
Different cabinet materials require slightly different approaches. Identify the material before beginning your painting project.
'Wood is the best surface for painting,' notes a home valuation expert. 'Unfinished, painted, stained wood, MDF, and faux wood work well. Any material that can be sanded for paint adhesion is suitable. However, laminates are less ideal because while you can paint them, the results won't last long. Always de-gloss stained wood and glossy surfaces with a liquid sander before painting.'
Consider other options for refreshing wood cabinets, such as refinishing with varnish or staining instead of painting.
9. Sand All Surfaces
Lightly sand every surface you intend to paint, whether it's lacquer, varnish, or a previous coat of paint. This creates a key for the new paint to adhere to.
'Sanding is essential!' insists an interiors curator. 'Many DIY-painted cabinets chip or flake because they weren't sanded properly. Remember to sand between each coat of paint, not just at the start. Pay special attention to corners, edges, and crevices where chipping can occur if not properly prepared.'
Experts suggest using a random orbital sander for efficiency, but tricky areas like cabinet door edges should be sanded by hand. If the cabinets have never been painted before, start with medium-grit sandpaper followed by finer grit. If there's excessive paint or rough patches, consider stripping.
Always vacuum up dust from sanding and wear a dust mask for safety.
10. Properly Prime the Doors
Once you've prepped the kitchen, including a final cleaning after sanding, priming is the next crucial step.
'Apply at least one coat of primer,' recommends a general manager from a painting service. 'For wooden products, use a primer that blocks natural wood tannins from bleeding through the paint. An oil-based primer is usually best for this task.'
Another expert suggests applying two coats of primer with a paintbrush, allowing the first coat to dry (about 1-2 hours) before adding the second coat. 'After the second coat dries, lightly sand the primer with fine sandpaper.'
It's advisable to avoid all-in-one primer and paint products, as they often don't yield the same professional finish.
11. Choose the Right Paint
Whether you prefer deep navy, pastel hues, or classic white, selecting the right type and finish of paint is essential for revitalizing your kitchen doors. Interior experts recommend using high-quality paint in thin layers for better coverage and durability.
'Don't cut corners on paint,' advises an experienced handyman. 'You're saving money by doing it yourself, so invest a little extra in high-quality paint.'
When it comes to paint finish, gloss, satin, or semi-gloss options create a resilient, wipeable surface, according to a marketing director.
'Durability is crucial for kitchen surfaces,' another expert explains. 'Cabinets and islands endure a lot of wear and tear, so ensure your chosen paint can handle the job. Eggshell is a popular finish for a sleek, modern look, while satin finishes are sufficient for cleaning away smudges; for a shinier appearance, consider semi-gloss or gloss paint.'
12. Test Colors with Sample Pots
Selecting the perfect color can be challenging with so many choices available. Take cues from your existing countertops, fixtures, and flooring to inspire your cabinet color refresh. Darker shades can work well on lower cabinets, paired with light or neutral shades on upper cabinets to create a sense of height. In galley kitchens, contrasting dark and light shades can help avoid a cramped feel.
'Always sample colors!' suggests a paint associate. 'Be sure to observe the color in your kitchen's lighting before committing to paint. Each kitchen has unique lighting that can affect how the color appears.'
13. Choose Your Application Method Wisely
For cabinets, applying two coats of paint is crucial to achieve the desired finish. Experts recommend using a fine-bristle brush, ideally between two to two-and-a-half inches wide. Some also recommend combining a roller and brush: using a roller can speed up the process, but the texture it creates may not suit glossy finishes.
'A high-quality smooth mini roller is ideal for achieving a great finish,' advises a paint expert. 'Consider using a sustainably sourced brush for edges and corners.'
Alternatively, spraying the cabinets can provide a sleek, professional finish. However, this method requires ample space and specialized equipment, so it may be best left to professionals.
14. Apply Multiple Topcoats with Sanding In-Between
Ensure you apply at least two coats of paint, allowing each to fully dry (approximately one to two hours) before starting the next.
'Sand between coats to create an ultra-smooth surface before applying the next layer. The final coat should be thin,' advises another paint professional. 'Some lighter colors or semi-opaques may benefit from a third coat to enhance opacity and color richness.'
15. Perfect Your Painting Technique
Start by dipping your brush into the paint and addressing any difficult spots first. 'Once you tackle those tricky areas, use a roller for the rest of the cabinet surfaces,' another expert suggests. 'Allow the paint to dry for a few hours before making any touch-ups.'
A recommended technique involves rolling eggshell paint onto the prepared surface with a foam roller followed by a gentle brushing in one direction to create an even finish.
16. Ensure Proper Ventilation
Maintain good ventilation in the workspace, advises an industry expert. Direct a fan toward an open window and wear masks designed for painting. 'Keep your painting area tidy; it shouldn't resemble a chaotic worksite,' they add.
17. Allow Sufficient Drying Time
'My top advice is to take your time and avoid rushing!' says another paint expert. 'Thinner coats are better than thick ones (less is more), and ensure each layer dries completely before adding the next. Paint can take a while to cure, sometimes up to 28 days.'
Even after the final coat is dry to the touch, the curing process takes longer, which is why experts recommend waiting at least 12 to 24 hours before using the painted surfaces.
'It takes a few days for paint to fully harden, so minimize the use of pots, pans, and dishes during this time,' warns a creative director.
What is the Most Important Tip for Painting Kitchen Cabinets?
While there are no strict rules, removing cabinet doors for painting and taking off hardware before laying them flat will generally yield the best, most professional results.
If you decide not to remove the doors, be sure to mask off hinges and handles with tape to protect them from paint splatters. However, painting the cabinets is much easier with the doors off.


