Growing peas can feel like a delightful discovery. The time spent nurturing, harvesting, and enjoying these sweet vegetables is incredibly gratifying. There’s nothing quite like savoring your first fresh peas of the season, straight from the garden.
Peas are adaptable and can thrive in raised beds, borders, or pots on your patio or balcony. While they do require some attention, they are manageable for any gardener, so consider adding peas to your vegetable garden.
As climbing plants, peas make efficient use of space, adding vertical appeal to your garden design. They are prolific producers; the more you harvest, the more they yield.
“Nothing compares to a freshly picked pea. When I first grew them, I was astonished at the taste, especially coming from a background of canned peas,” shares a seeds expert. “Despite the rise of snow and sugar snap peas, growing shell peas yourself is often the only way to enjoy their full flavor.”
“Sweet and crunchy, peas are an early summer tradition much like corn later in the season. I often eat them raw right off the vine, but if you have a large harvest, they freeze well for winter meals,” the expert adds.

Starting Peas from Seed
Growing peas from seed is ideal, although you can buy young plants if you miss the sowing time.
“Peas thrive in cool conditions, so plant them in early spring and again in midsummer for a fall yield,” the expert advises. “They prefer well-drained soil, full sunlight, and benefit from trellising.”
Before planting, clear the area of weeds and stones. Incorporate ample organic matter into the soil but avoid manure, which can lead to excessive foliage and fewer pods.
To maintain a steady supply of peas, sow seeds every two weeks rather than all at once.
- Sow seeds in the ground after the last frost and once the soil warms, avoiding overly wet conditions.
- Plant double the seeds you need and thin out weaker seedlings as they grow.
- Seeds should be planted 1-2 inches deep, but check packet instructions for specific varieties.
- Space plants about four inches apart, with rows at least two feet apart.
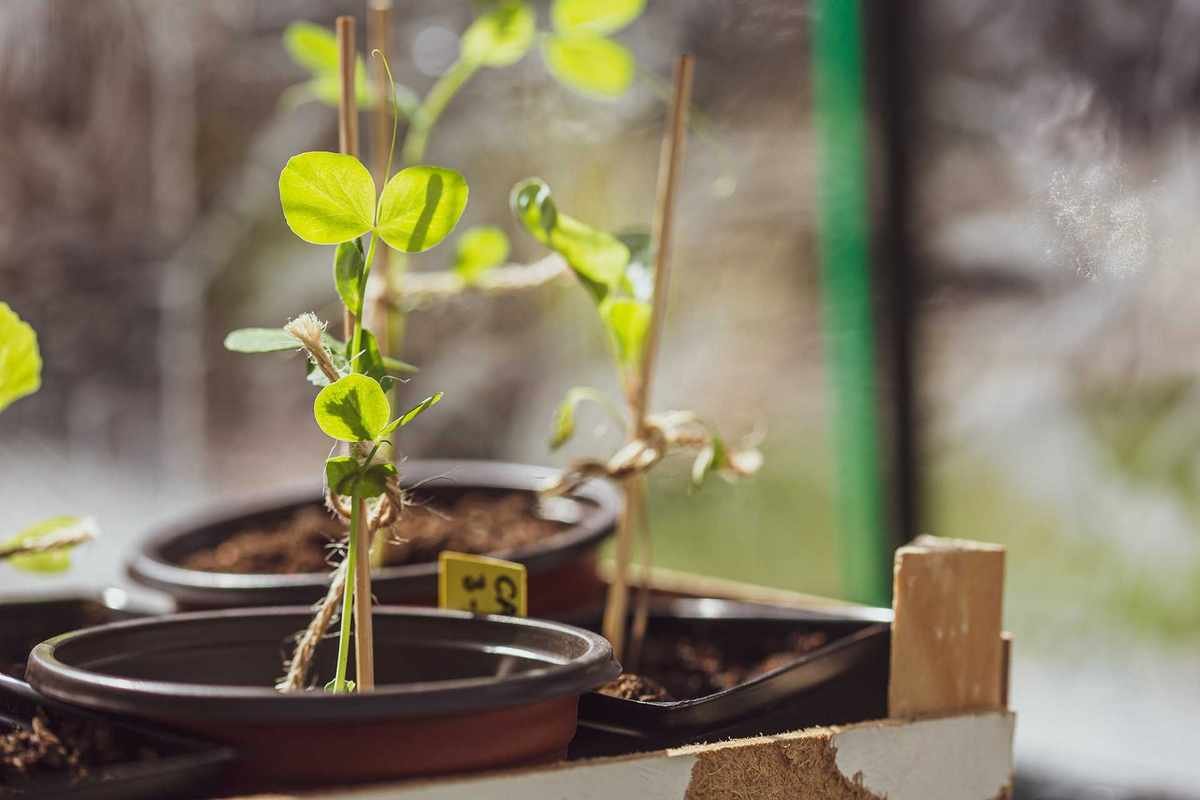
- Start peas under cover for an early harvest.
- Use tall pots or root trainers to allow robust root development.
- Employ a well-draining potting mix and plant one seed per pot.
- Water gently to avoid seed rot.
- Germination can occur within a week, but may take longer in cooler temperatures.
- Support should be added early, as plants grow quickly, even dwarf varieties need some.
- Maintain moist soil without letting it dry out.
- After flowering, fertilize weekly with liquid tomato feed.
Supporting Growing Peas
As climbing plants, peas need support while growing. “Trellises lift pea plants off the ground, protecting them from soil diseases and pests,” advises the expert.
Explore various trellis ideas that enhance your pea growth. Adding supports when plants are young ensures they can easily climb as they mature.
“Utilize tripods and climbing frames, or cover fences with wire or lattice,” suggests a gardening professional. “Pair them with sweet peas for added color and scent, and nasturtiums can deter pests.”
Growing Peas in Pots
Peas are perfect for a container garden, adding charm to your patio or balcony. Keeping them close to the kitchen encourages regular harvesting. Dwarf varieties are especially suited for pot cultivation.
Select a container of at least 3-5 gallons to accommodate 3-6 pea plants. For more, use larger pots or multiple containers.
Choose a potting mix formulated for vegetables or create your own by mixing garden compost.
Provide support as the peas grow, positioning them near a trellis or inserting sticks.
“Insert support at sowing time to avoid disturbing roots later,” recommends an author. “Use pea sticks or brushwood as climbing aids. Ensure your pot is large enough, as peas can be heavy.”
Since pot soil dries out faster, monitor watering closely. “Water every other day to keep peas fresh and vibrant,” advises the author.
Fertilize weekly from flowering with liquid feed.

Choosing Pea Varieties
With numerous pea varieties available, each offers distinct flavors and growth characteristics. Planting multiple types can extend your harvest period.
Heritage peas are especially flavorful and worth growing, according to experts.
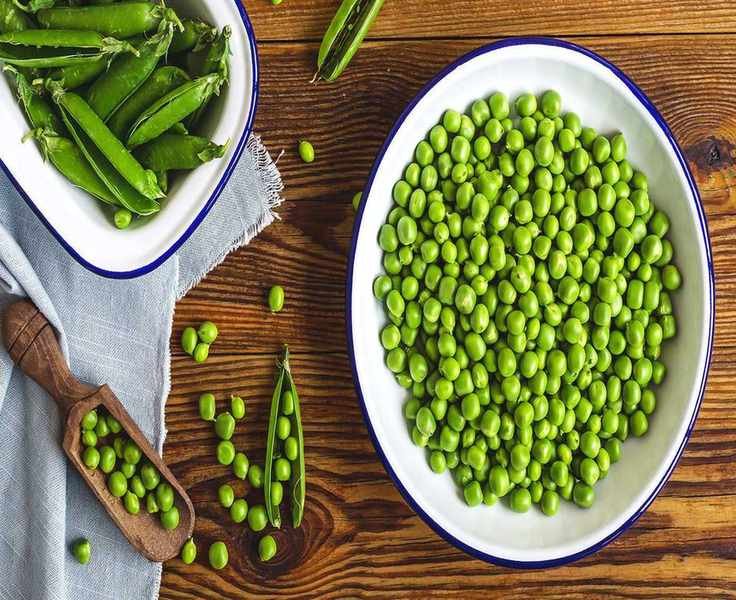
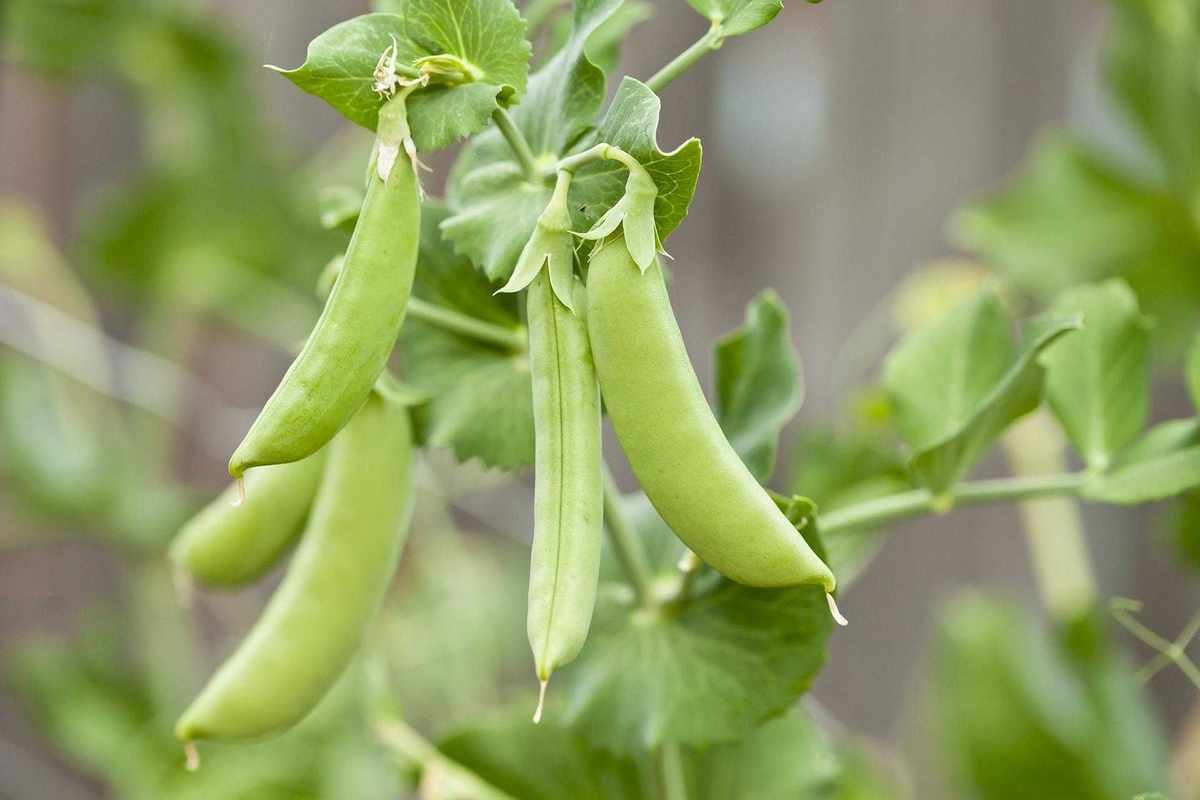
Shelling peas require removal from their pods, which swell significantly. You can eat them whole when young. Seeds may be either wrinkled or round, with some varieties suitable for autumn planting for a spring harvest.
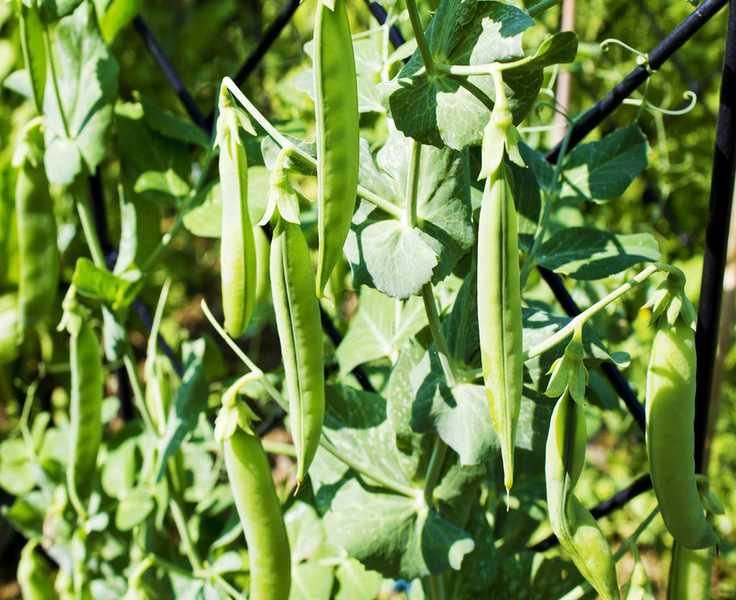
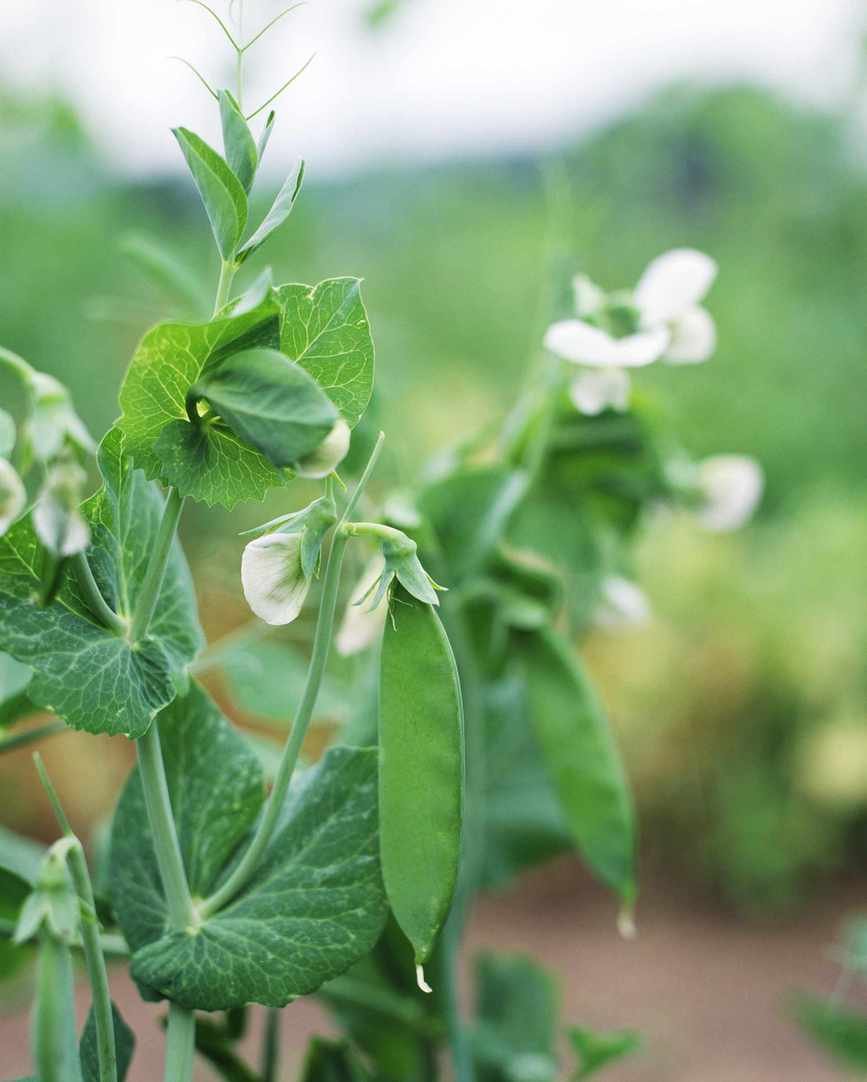
Mangetout and sugar snap peas can be consumed with their pods. Mangetout remains flat, while sugar snaps develop peas that can be harvested as regular peas if left longer.
Dwarf varieties are smaller plants that are easier to manage, making them ideal for limited spaces.
- Alderman is a reliable shell pea with an extended cropping period, perfect for those wanting one variety.
- Emerald Archer is a newer organic midseason shell pea known for its exceptional yield and flavor.
- Purple Podded peas are visually appealing while the peas inside remain green.
- Hurst Green Shaft produces sweet, heavy yields and freezes well.
- Douce Provence is a round-seeded early variety suitable for fall planting.
- For dwarf options, consider Markana, Snowbird, or Blue Bantam.
- Mangetout varieties like Carouby de Maussane offer charming flowers and large pods; also try Blizzard, Norli, and Weggiser.
- Sugar snap peas often go by generic names, but Mega and Sugar Lode are recommended varieties.
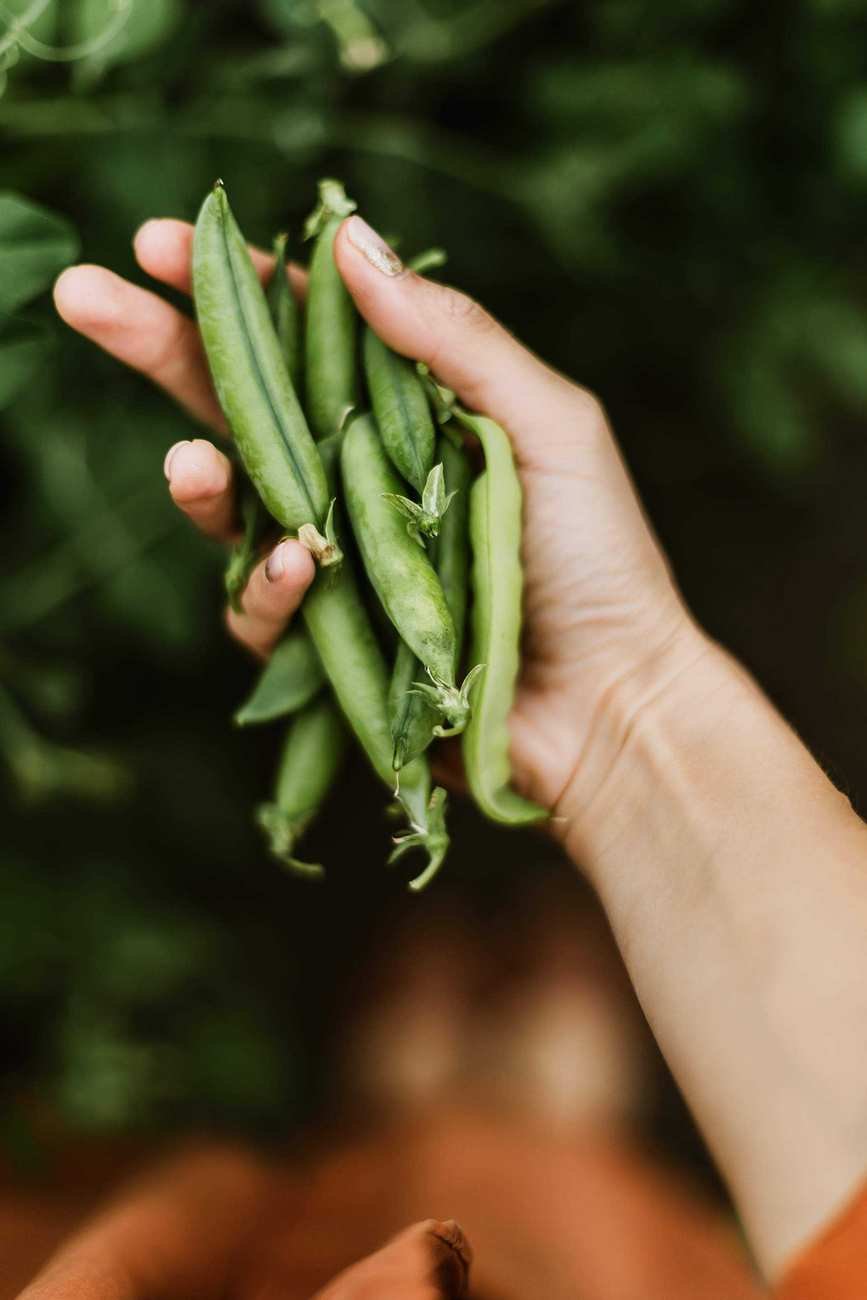
Harvesting Peas
Peas are typically ready to harvest 8-12 weeks post-sowing, and should be picked at their prime.
Identifying the right time to harvest can take some experimentation. For shelling types, look for plump pods that are nearly cylindrical. A slight gap between peas is a good sign when holding the pod to the light.
Sugar snap and mangetout should be harvested just as the peas start forming.
Properly timed, fresh peas taste sweet and tender; if they become bitter or tough, they were left too long on the vine.
Harvest from the base of the plant upwards, using both hands or scissors for clean cuts.
Shell peas by snapping the pod's end and removing the peas with your fingers.
Enjoy them right away or freeze for later use.
“Fresh peas are a prime example of how much better an annual crop tastes when consumed immediately. The shoots are also delicious, adding zest to salads, pasta, or risottos,” the author notes.
Compost empty pods or use them to create soups or sauces.
Common Pests and Issues
Pea seeds attract mice and birds, so cover them or start seedlings indoors to protect them during their most vulnerable stage.
Aphids can also be a concern, but strategies like companion planting can help. “Calendula draws hoverflies that eat aphids, while nasturtiums repel aphids from peas,” explains a gardening expert.
Be vigilant for pea moth caterpillars, which lay eggs on flowering peas and can go unnoticed until pods are opened. If affected, adjust your planting schedule for next year or use mesh to protect your crop.
Mangetout peas are harvested before peas develop, protecting them from the moth.
Pea Growth Timeline
Peas typically take 8-12 weeks to grow from sowing to harvest, with continued production for weeks if harvested regularly.
Once production slows, leave a few pods to dry out for seeds for the next planting season.
Do Peas Need Support?
Climbing peas can exceed 6 feet, necessitating support to prevent them from falling over.
Dwarf varieties also appreciate some support, though they can manage without much.
Optimal Pea Growing Methods
The most effective way to grow peas is from seed, starting them indoors in early spring, then transferring them outdoors after frost danger has passed.
Sunlight Needs for Peas
Peas prefer moderate climates and should not be exposed to extreme heat or cold. If you live in a warm area, provide shade during peak sun hours.
While they tolerate damp conditions, avoid waterlogging.